Creating a blog with pelican and Github pages
~ 5 min read
Today I'm going to talk about how this blog was created. Before we begin, I expect you to be familiarized with using Github and creating a Python virtual enviroment to develop. If you aren't, I recommend you to learn with the Django Girls tutorial, which covers that and more.
This is a tutorial to help you publish a personal blog hosted by Github. For that, you will need a regular Github user account (instead of a project account).
The first thing you will do is to create the Github repository where your code will live. If you want your blog to point to only your username (like rsip22.github.io) instead of a subfolder (like rsip22.github.io/blog), you have to create the repository with that full name.
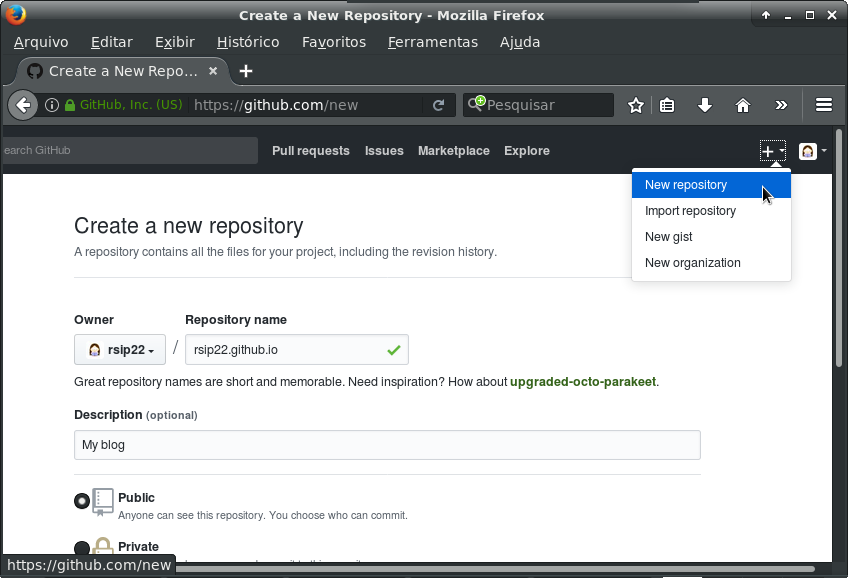
I recommend that you initialize your repository with a README, with a .gitignore for Python and with a free software license. If you use a free software license, you still own the code, but you make sure that others will benefit from it, by allowing them to study it, reuse it and, most importantly, keep sharing it.
Now that the repository is ready, let's clone it to the folder you will be using to store the code in your machine:
$ git clone https://github.com/YOUR_USERNAME/YOUR_USERNAME.github.io.git
And change to the new directory:
$ cd YOUR_USERNAME.github.io
Because of how Github Pages prefers to work, serving the files from the master branch, you have to put your source code in a new branch, preserving the "master" for the output of the static files generated by Pelican. To do that, you must create a new branch called "source":
$ git checkout -b source
Create the virtualenv with the Python3 version installed on your system.
On GNU/Linux systems, the command might go as:
$ python3 -m venv venv
or as
$ virtualenv --python=python3.5 venv
And activate it:
$ source venv/bin/activate
Inside the virtualenv, you have to install pelican and it's dependencies. You should also install ghp-import (to help us with publishing to github) and Markdown (for writing your posts using markdown). It goes like this:
(venv)$ pip install pelican markdown ghp-import
Once that is done, you can start creating your blog using pelican-quickstart:
(venv)$ pelican-quickstart
Which will prompt us a series of questions. Before answering them, take a look at my answers below:
> Where do you want to create your new web site? [.] ./
> What will be the title of this web site? Renata's blog
> Who will be the author of this web site? Renata
> What will be the default language of this web site? [pt] en
> Do you want to specify a URL prefix? e.g., http://example.com   (Y/n) n
> Do you want to enable article pagination? (Y/n) y
> How many articles per page do you want? [10] 10
> What is your time zone? [Europe/Paris] America/Sao_Paulo
> Do you want to generate a Fabfile/Makefile to automate generation and publishing? (Y/n) Y **# PAY ATTENTION TO THIS!**
> Do you want an auto-reload & simpleHTTP script to assist with theme and site development? (Y/n) n
> Do you want to upload your website using FTP? (y/N) n
> Do you want to upload your website using SSH? (y/N) n
> Do you want to upload your website using Dropbox? (y/N) n
> Do you want to upload your website using S3? (y/N) n
> Do you want to upload your website using Rackspace Cloud Files? (y/N) n
> Do you want to upload your website using GitHub Pages? (y/N) y
> Is this your personal page (username.github.io)? (y/N) y
Done. Your new project is available at /home/username/YOUR_USERNAME.github.io
About the time zone, it should be specified as TZ Time zone (full list here: List of tz database time zones).
Now, go ahead and create your first blog post! You might want to open the project folder on your favorite code editor and find the "content" folder inside it. Then, create a new file, which can be called my-first-post.md (don't worry, this is just for testing, you can change it later). The contents should begin with the metadata which identifies the Title, Date, Category and more from the post before you start with the content, like this:
.lang="markdown" # DON'T COPY this line, it exists just for highlighting purposes

Title: My first post
Date: 2017-11-26 10:01
Modified: 2017-11-27 12:30
Category: misc
Tags: first, misc
Slug: My-first-post
Authors: Your name
Summary: What does your post talk about? Write here.

This is the *first post* from my Pelican blog. **YAY!**
Let's see how it looks?
Go to the terminal, generate the static files and start the server. To do that, use the following command:
(venv)$ make html && make serve
While this command is running, you should be able to visit it on your favorite web browser by typing localhost:8000 on the address bar.
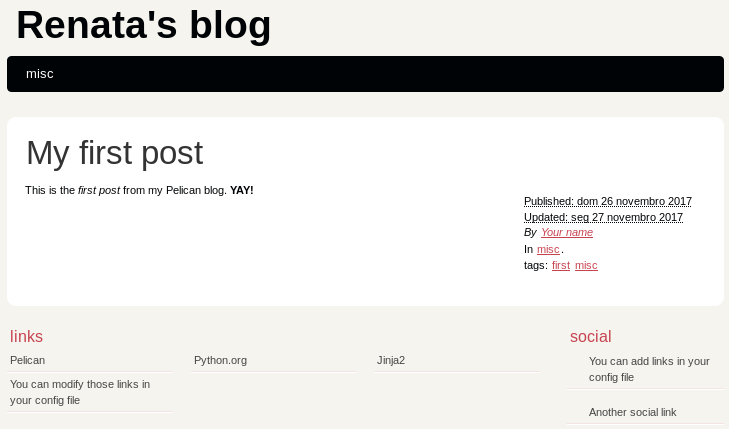
Pretty neat, right?
Now, what if you want to put an image in a post, how do you do that? Well, first you create a directory inside your content directory, where your posts are. Let's call this directory 'images' for easy reference. Now, you have to tell Pelican to use it. Find the pelicanconf.py, the file where you configure the system, and add a variable that contains the directory with your images:
.lang="python" # DON'T COPY this line, it exists just for highlighting purposes

STATIC_PATHS = ['images']
Save it. Go to your post and add the image this way:
.lang="markdown" # DON'T COPY this line, it exists just for highlighting purposes

You can interrupt the server at anytime pressing CTRL+C on the terminal. But you should start it again and check if the image is correct. Can you remember how?
(venv)$ make html && make serve
One last step before your coding is "done": you should make sure anyone can read your posts using ATOM or RSS feeds. Find the pelicanconf.py, the file where you configure the system, and edit the part about feed generation:
.lang="python" # DON'T COPY this line, it exists just for highlighting purposes

FEED_ALL_ATOM = 'feeds/all.atom.xml'
FEED_ALL_RSS = 'feeds/all.rss.xml'
AUTHOR_FEED_RSS = 'feeds/%s.rss.xml'
RSS_FEED_SUMMARY_ONLY = False
Save everything so you can send the code to Github. You can do that by adding all files, committing it with a message ('first commit') and using git push. You will be asked for your Github login and password.
$ git add -A && git commit -a -m 'first commit' && git push --all
And... remember how at the very beginning I said you would be preserving the master branch for the output of the static files generated by Pelican? Now it's time for you to generate them:
$ make github
You will be asked for your Github login and password again. And... voilà! Your new blog should be live on https://YOUR_USERNAME.github.io.
If you had an error in any step of the way, please reread this tutorial, try and see if you can detect in which part the problem happened, because that is the first step to debbugging. Sometimes, even something simple like a typo or, with Python, a wrong indentation, can give us trouble. Shout out and ask for help online or on your community.
For tips on how to write your posts using Markdown, you should read the Daring Fireball Markdown guide.
To get other themes, I recommend you visit Pelican Themes.
This post was adapted from Adrien Leger's Create a github hosted Pelican blog with a Bootstrap3 theme. I hope it was somewhat useful for you.